Mastering CMMT Servo Drives: Backups, Network Configurations, and Web Diagnostics
By Alberto Mercado, Electric Automation Business Developer, Festo Mexico

Hardware and Software used
Hardware:
- Servo drive CMMT-ST-C8-1C-MP-S0
Software Versions:
- Festo Automation Suite V2.8.0.417
- CMMT-ST Plug-in V2.8.2.0
- Scan extension V2.8.1.40
Backup with Festo Automation Suite
Festo’s CMMT servo drives family offers several ways to obtain a backup of the contained configuration, but for this note we will focus on the option through the Festo Automation Suite.
But why is it important to obtain a backup? The answer is simple, this configuration describes the hardware that is controlled by the servo drive, as well as the application parameters such as working load, stroke, among other important parameters. It is a good practice to obtain the configuration backups when the equipment is installed for production purposes.
To start the process, you must open Festo Automation Suite and choose the “New Project” option. The software will display an environment like this one:
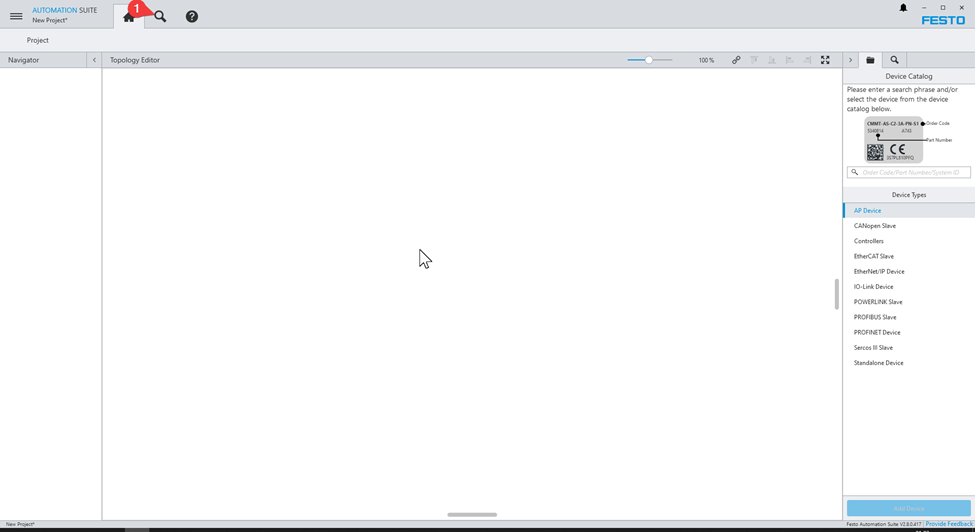
- Click on “Device Scan” button, then device scan section will be showed, this section scans for devices in the network for conducting common tasks like firmware update or changing network settings.

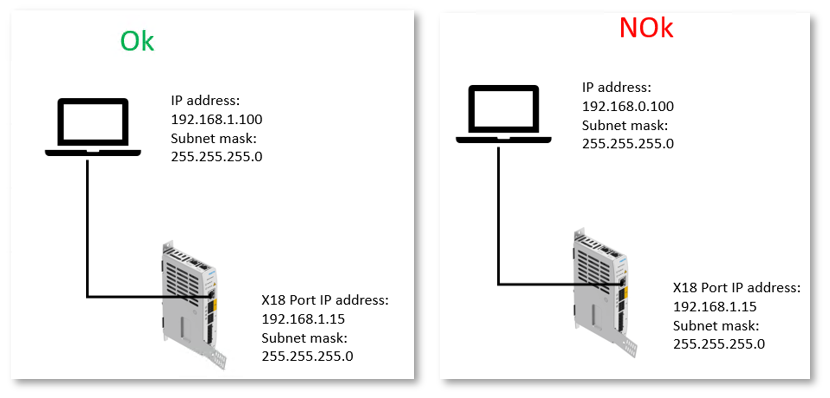
- Click on the device on which you will work, it is important to mention that your PC must be in the same network segment, because although the servo drive is detected when you have a dynamic IP or in a different network segment, it is not possible to obtain the backup if you don’t have an address in the same network segment.
- Click on “Add To Project” option, this starts the import process. A window like this will be displayed.
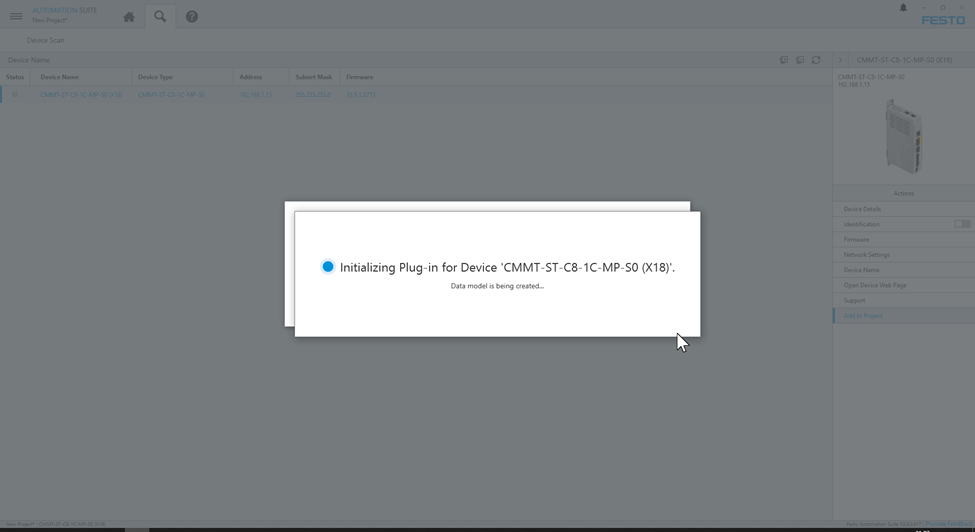
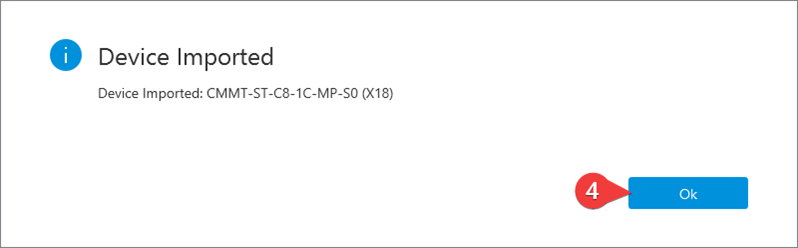
- Once the process is finished, a window like this one will appear, click on “Ok”.
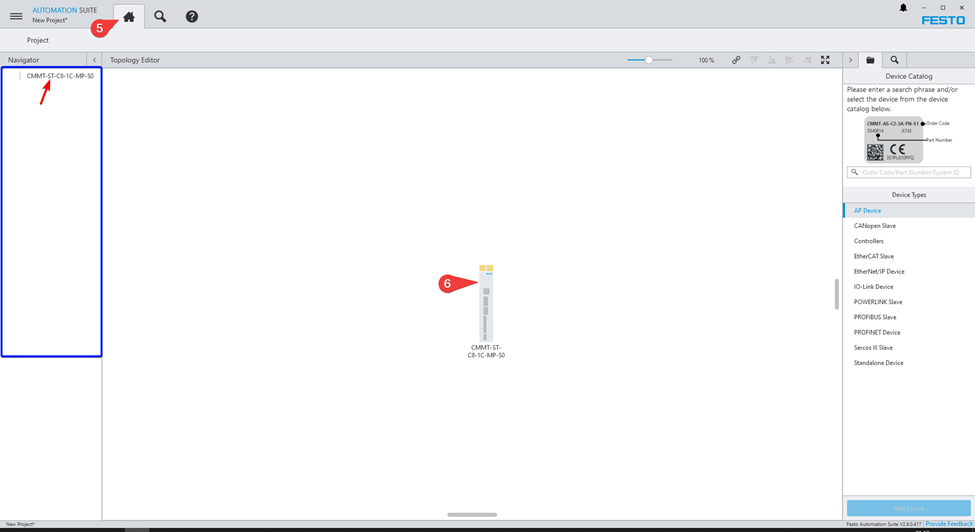
- Click on “Project Section”, here are shown the devices that the project has (it can have multiple devices).
- This is the imported device in its graphical representation.
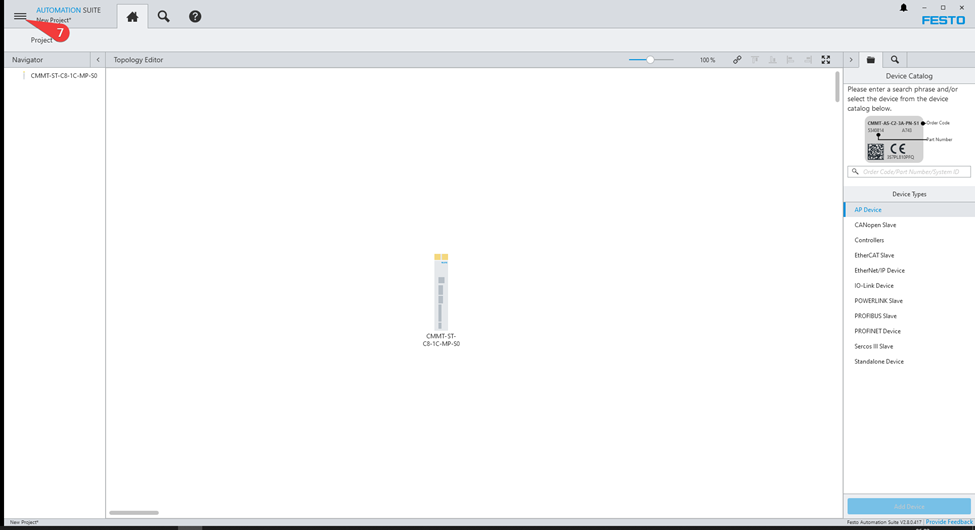
- Click on the top menu tu display options and save project.
- Click on “Save As”
- Search for the desired location by clicking “Browse”
- Enter the project name
- Click on “Save”

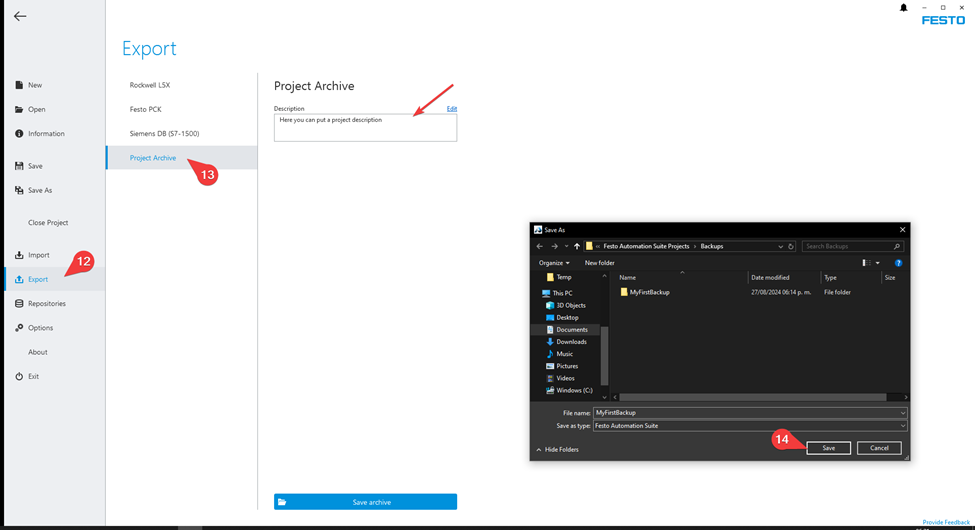
- Click on export
- Select “Project Archive” option
- Save the file
Optionally, you may add comments that describe the project to provide additional information.
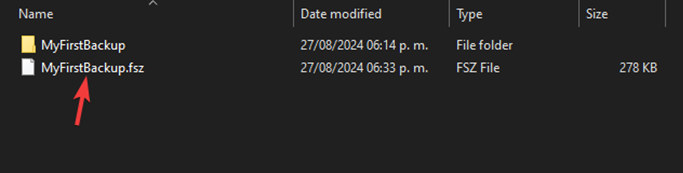
This file MyFirstBackup.fsz contains all the information received from the device. It can be “Imported” in a new project.
Change network settings
First, this is an overview of the connection technology; you can refer to the user manual for more information.
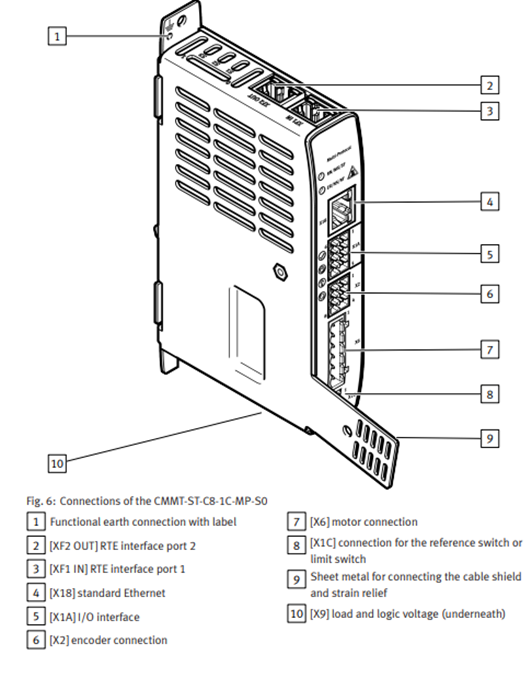
The IP address of the communication port to the PLC (XF1 IN / XF2 OUT) is set directly on the PLC in Profinet, while in Modbus and Ethernet/IP it is set in the configuration process in “Fieldbus” section on Festo Automation Suite.
This is a common process, and it is important to know that the network parameters to be modified with this procedure correspond to port X18 (configuration port).
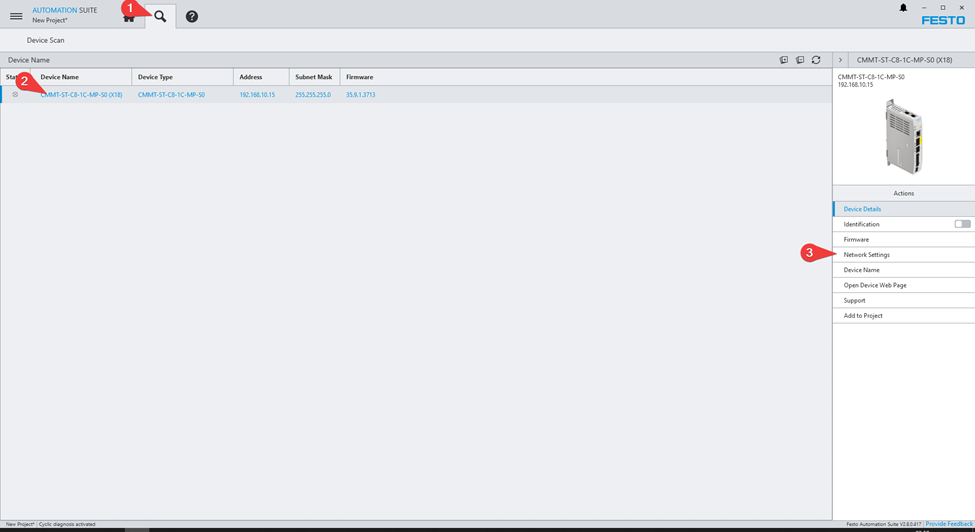
- Click on “Device Scan”
- From the list, select the desired device by clicking on the device name
- Click on “Network Settings”
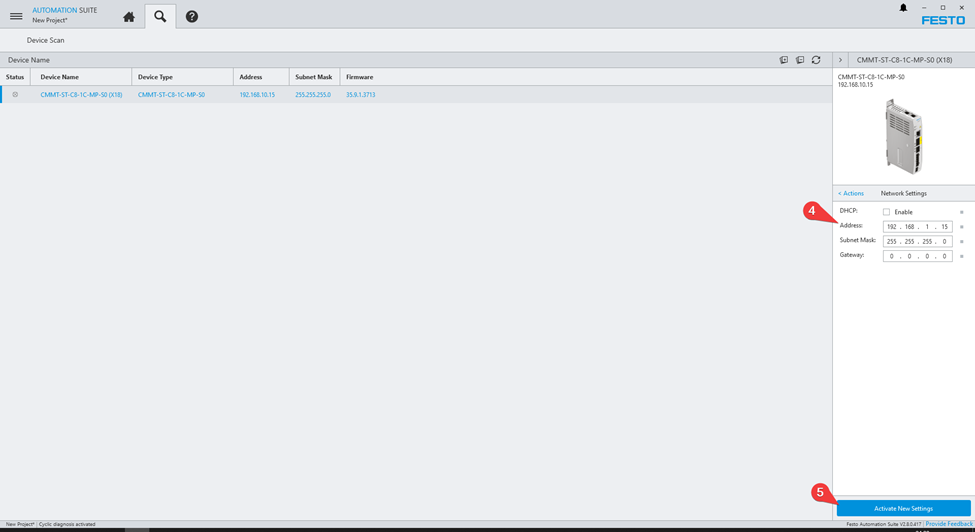
- Modify the network settings as desired
- Click on “Activate New Settings”
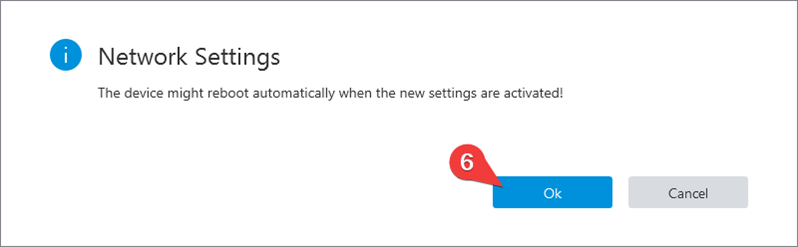
- Finally, click on the “Ok” button. The servo drive might reboot automatically, and the new network settings will be active. Important, this process can be done with dynamic IP address on your PC, or if the PC and servo drive have different network settings.
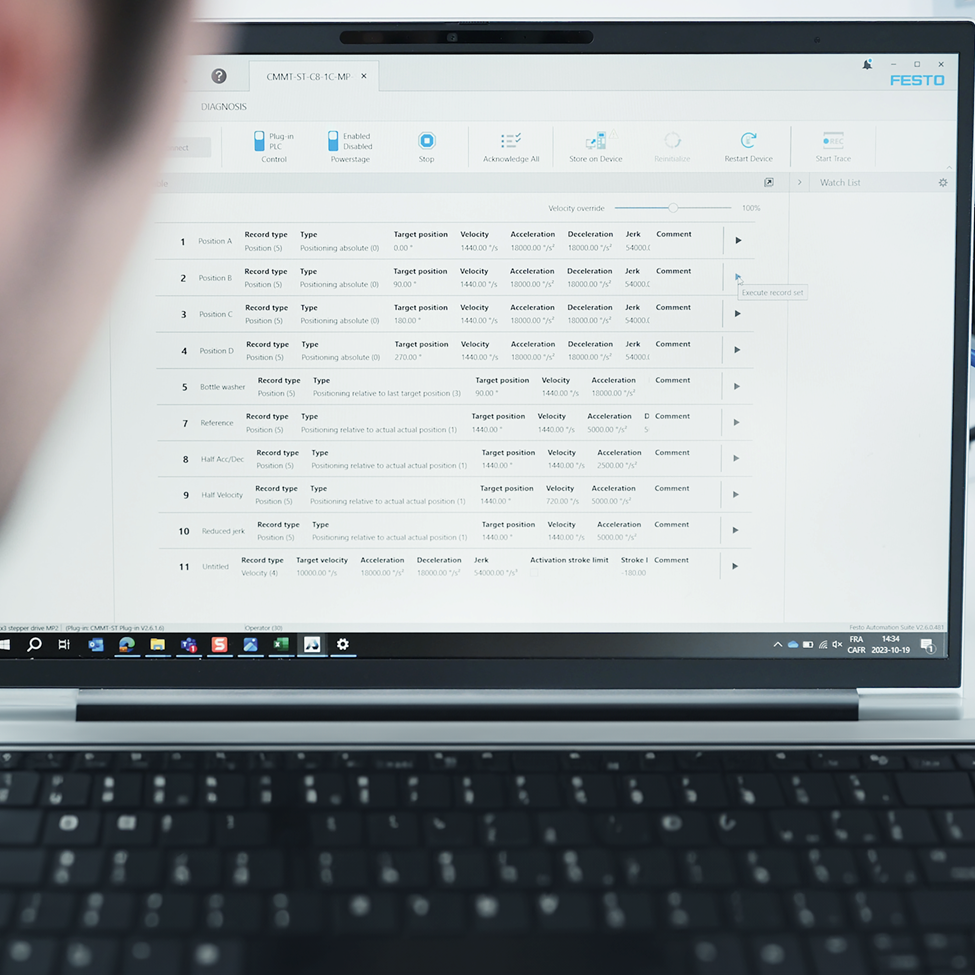
Diagnosis information with device webpage
There is an alternative to obtain the information corresponding to diagnostic events, for this we can type directly in a web browser the IP address of the configuration port (X18) or do it through the “Scan” extension in Festo Automation Suite, this is a useful way to obtain information for diagnosis, if you don’t have the plug-in installed.
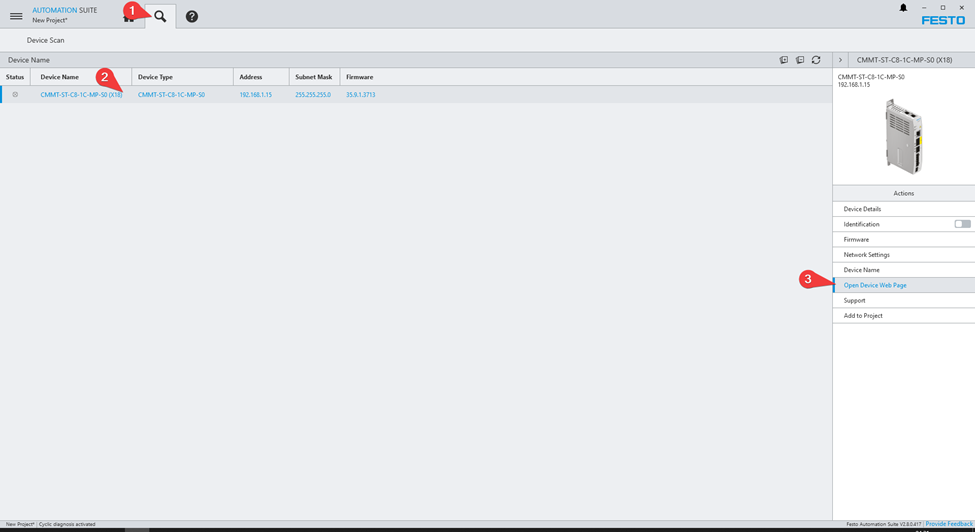
- Go to the scan section
- Select the device you want to access
- Select the “Open Device Web Page”
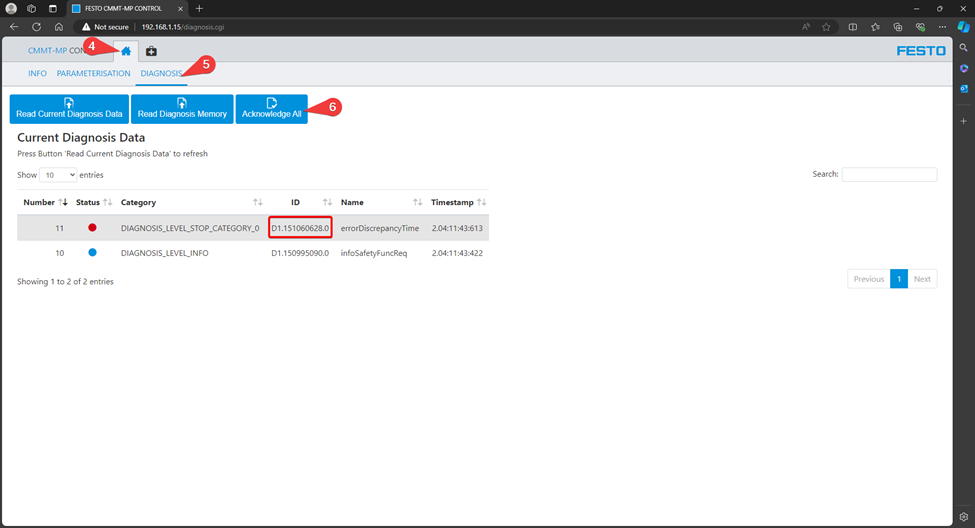
- Click on Home section
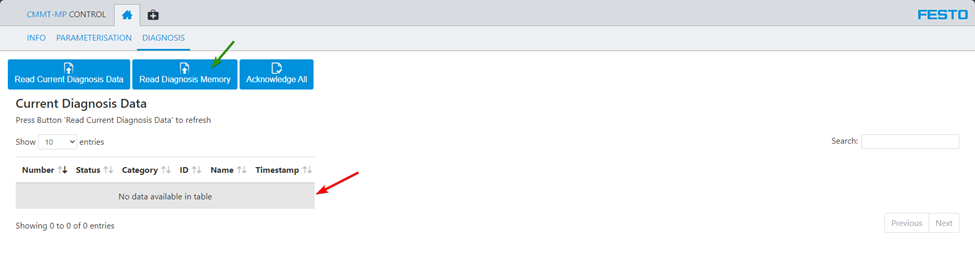
- Go to Diagnosis in the top menu
- If it is a transient error, this option (Acknowledge All) will remove errors and information warnings messages, however, if the error continues it will be displayed in a solid tone in “status” section (error messages are displayed in red, warnings in yellow, and informative in blue)
In the above example, the error code is D1.151060628.0, information and recommendations for its solution can be found in the user manual in the section “Diagnostic messages with information for fault clearance”. To access the user manual, you must have an internet connection (only for the first time).
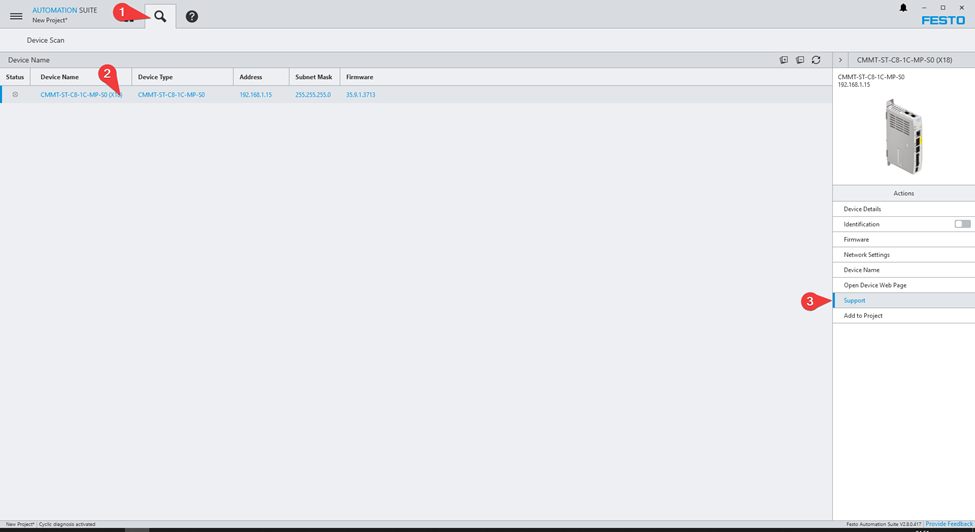
- Click on “Scan Device”
- Select the desired element (servo drive)
- Go to Support section and click on it
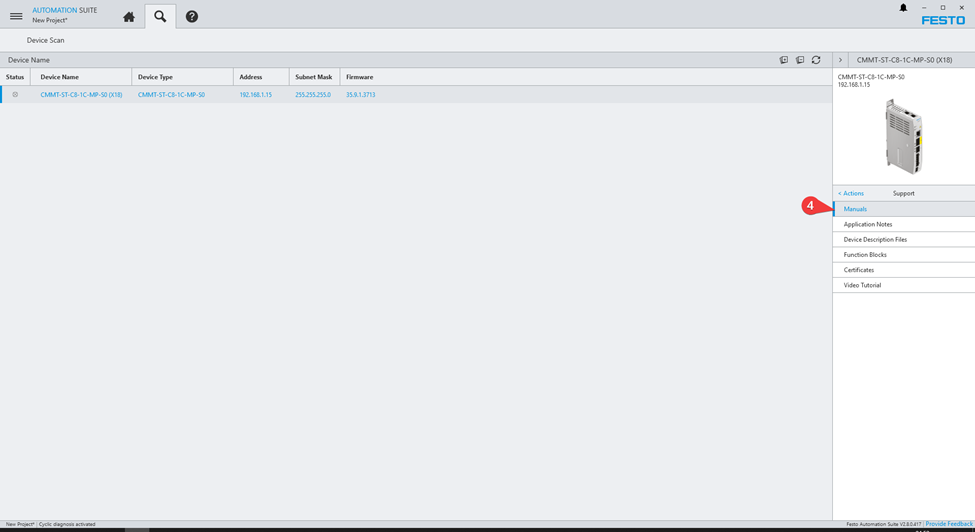
- Click on Manuals
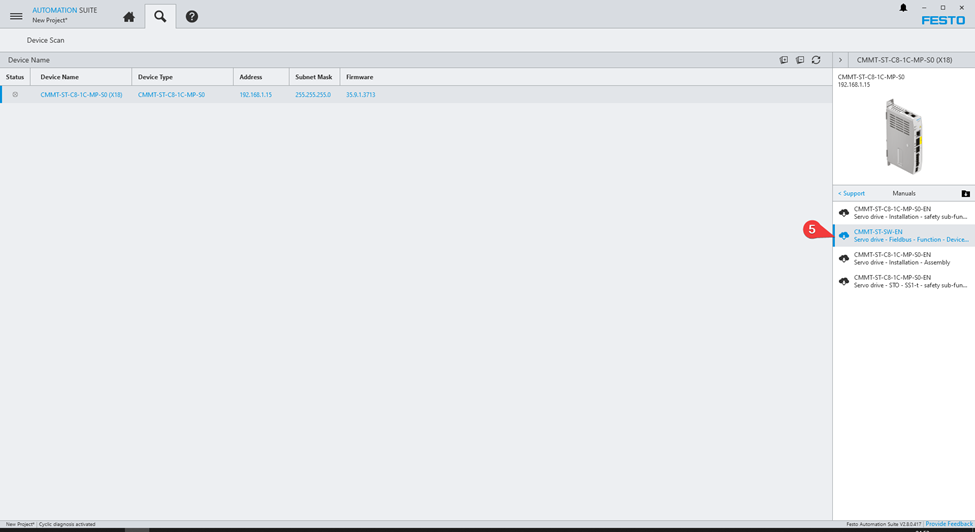
- Select the desired user manual, for example Servo Drive functions – fieldbus -…
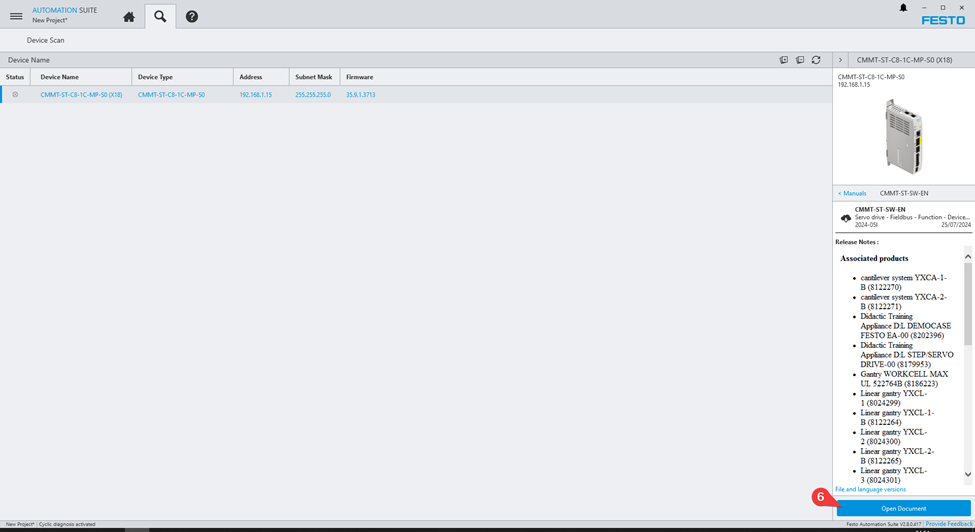
- Click on “Open Document”
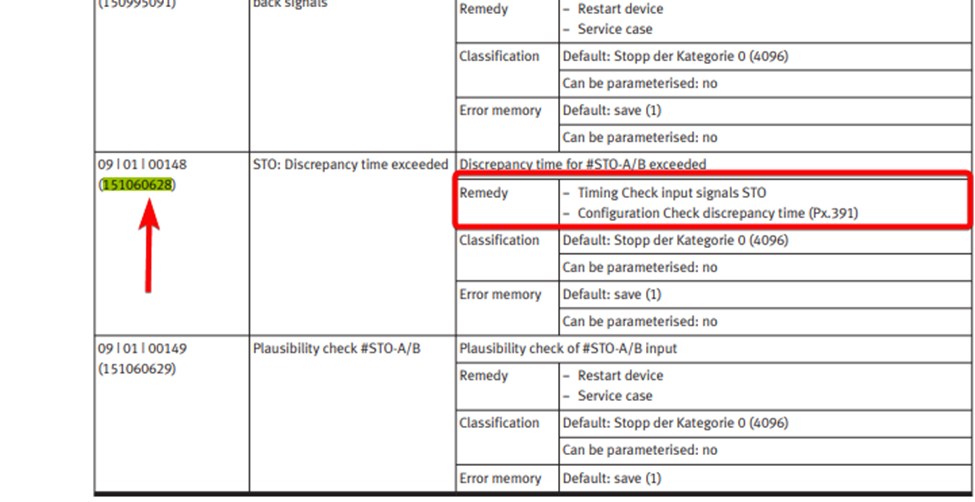
- Once the document is open, look for the error code, you can copy it from the device web page and paste it in the search field… here you will get useful information for the solution of the error.
When the error is corrected, you can click on the “Acknowledge All” button and the servo drive will return to the ready state, the red arrow shows the error-free section, while the green arrow shows the button that can read the entire servo drive error history.
Reference
For more information, you can refer to the user manual for CMMT servo drive, it could be found in www.festo.com. Please see descriptions for complete information or in case your software version or hardware configuration is not described in this document.
Disclaimer
Disclaimer: This post is provided solely for the purpose of offering setup assistance and general guidance. It is important to note that the ultimate responsibility for ensuring the overall safety and proper functionality of the machine lies with the System Integrator / End User. It is crucial to exercise caution, adhere to proper safety protocols, and consult relevant experts or professionals when necessary.
Although Festo employees will be contributing to this blog, please note this is not the official Festo support channel. For more timely technical support please reach out to your regional Festo support channel and/or consult user manuals and relevant documentation in www.festo.com